Documentation Index
Fetch the complete documentation index at: https://sigma-docs.pastel.africa/llms.txt
Use this file to discover all available pages before exploring further.
Upload transactions:
Add transactions from Transaction Monitoring, CSV upload, or your server
Overview
Manual reporting lets you create a report when you need it. You start by choosing a report type, then choose how to supply the records, review the selection, and continue to the report details page. Manual report creation follows four steps:- Report type
- Data source
- Select transactions or upload your CSV
- Review details before creating the report
Before you start
- Set up your reporting agents and entities in Reporting → Preferences
- If you want Sigma to retrieve transactions from your server, save your API connection in Reporting → Preferences → General
Two manual methods are available for transaction reports: you can either
work from transactions already available in Sigma, or you can upload a CSV and
let Sigma validate the rows before report creation. If your source system
holds the full transaction payload, you can also fetch it through your saved
manual API connection.
Available report types
- CTR - Report cash transactions that exceed the reporting threshold
- FTR - Report transfers involving movement of funds across institutions or borders
- STR - Report transactions that appear suspicious or inconsistent with expected behaviour
- SAR - Report suspicious activity patterns that require additional activity-party details
Creating a Manual Report
- Navigate to Reporting → All Reports
- Click Generate Report
- Choose a report type
- Choose a data source
- Complete the selection or upload step
- Review the selected rows
- Click Create Report
Report creation methods
Method 1: Build from Transaction Monitoring or CSV upload
Use this route when the transactions are already visible in Sigma, or when you want to upload additional rows through the CSV template. This method works well when:- Your team is reviewing flagged transactions directly in Sigma
- You want to combine selected transactions with additional uploaded rows
- You want to validate uploaded transactions before the report is created
Method 2: Retrieve from your server
Use this route when you only have transaction references in hand and the full transaction payload lives in your own internal system. In this flow:- You upload a CSV containing transaction IDs only
- Sigma uses your saved Manual API Connection to fetch the full details
- You review the returned rows before creating the report
Method 3: Create a Suspicious Activity Report
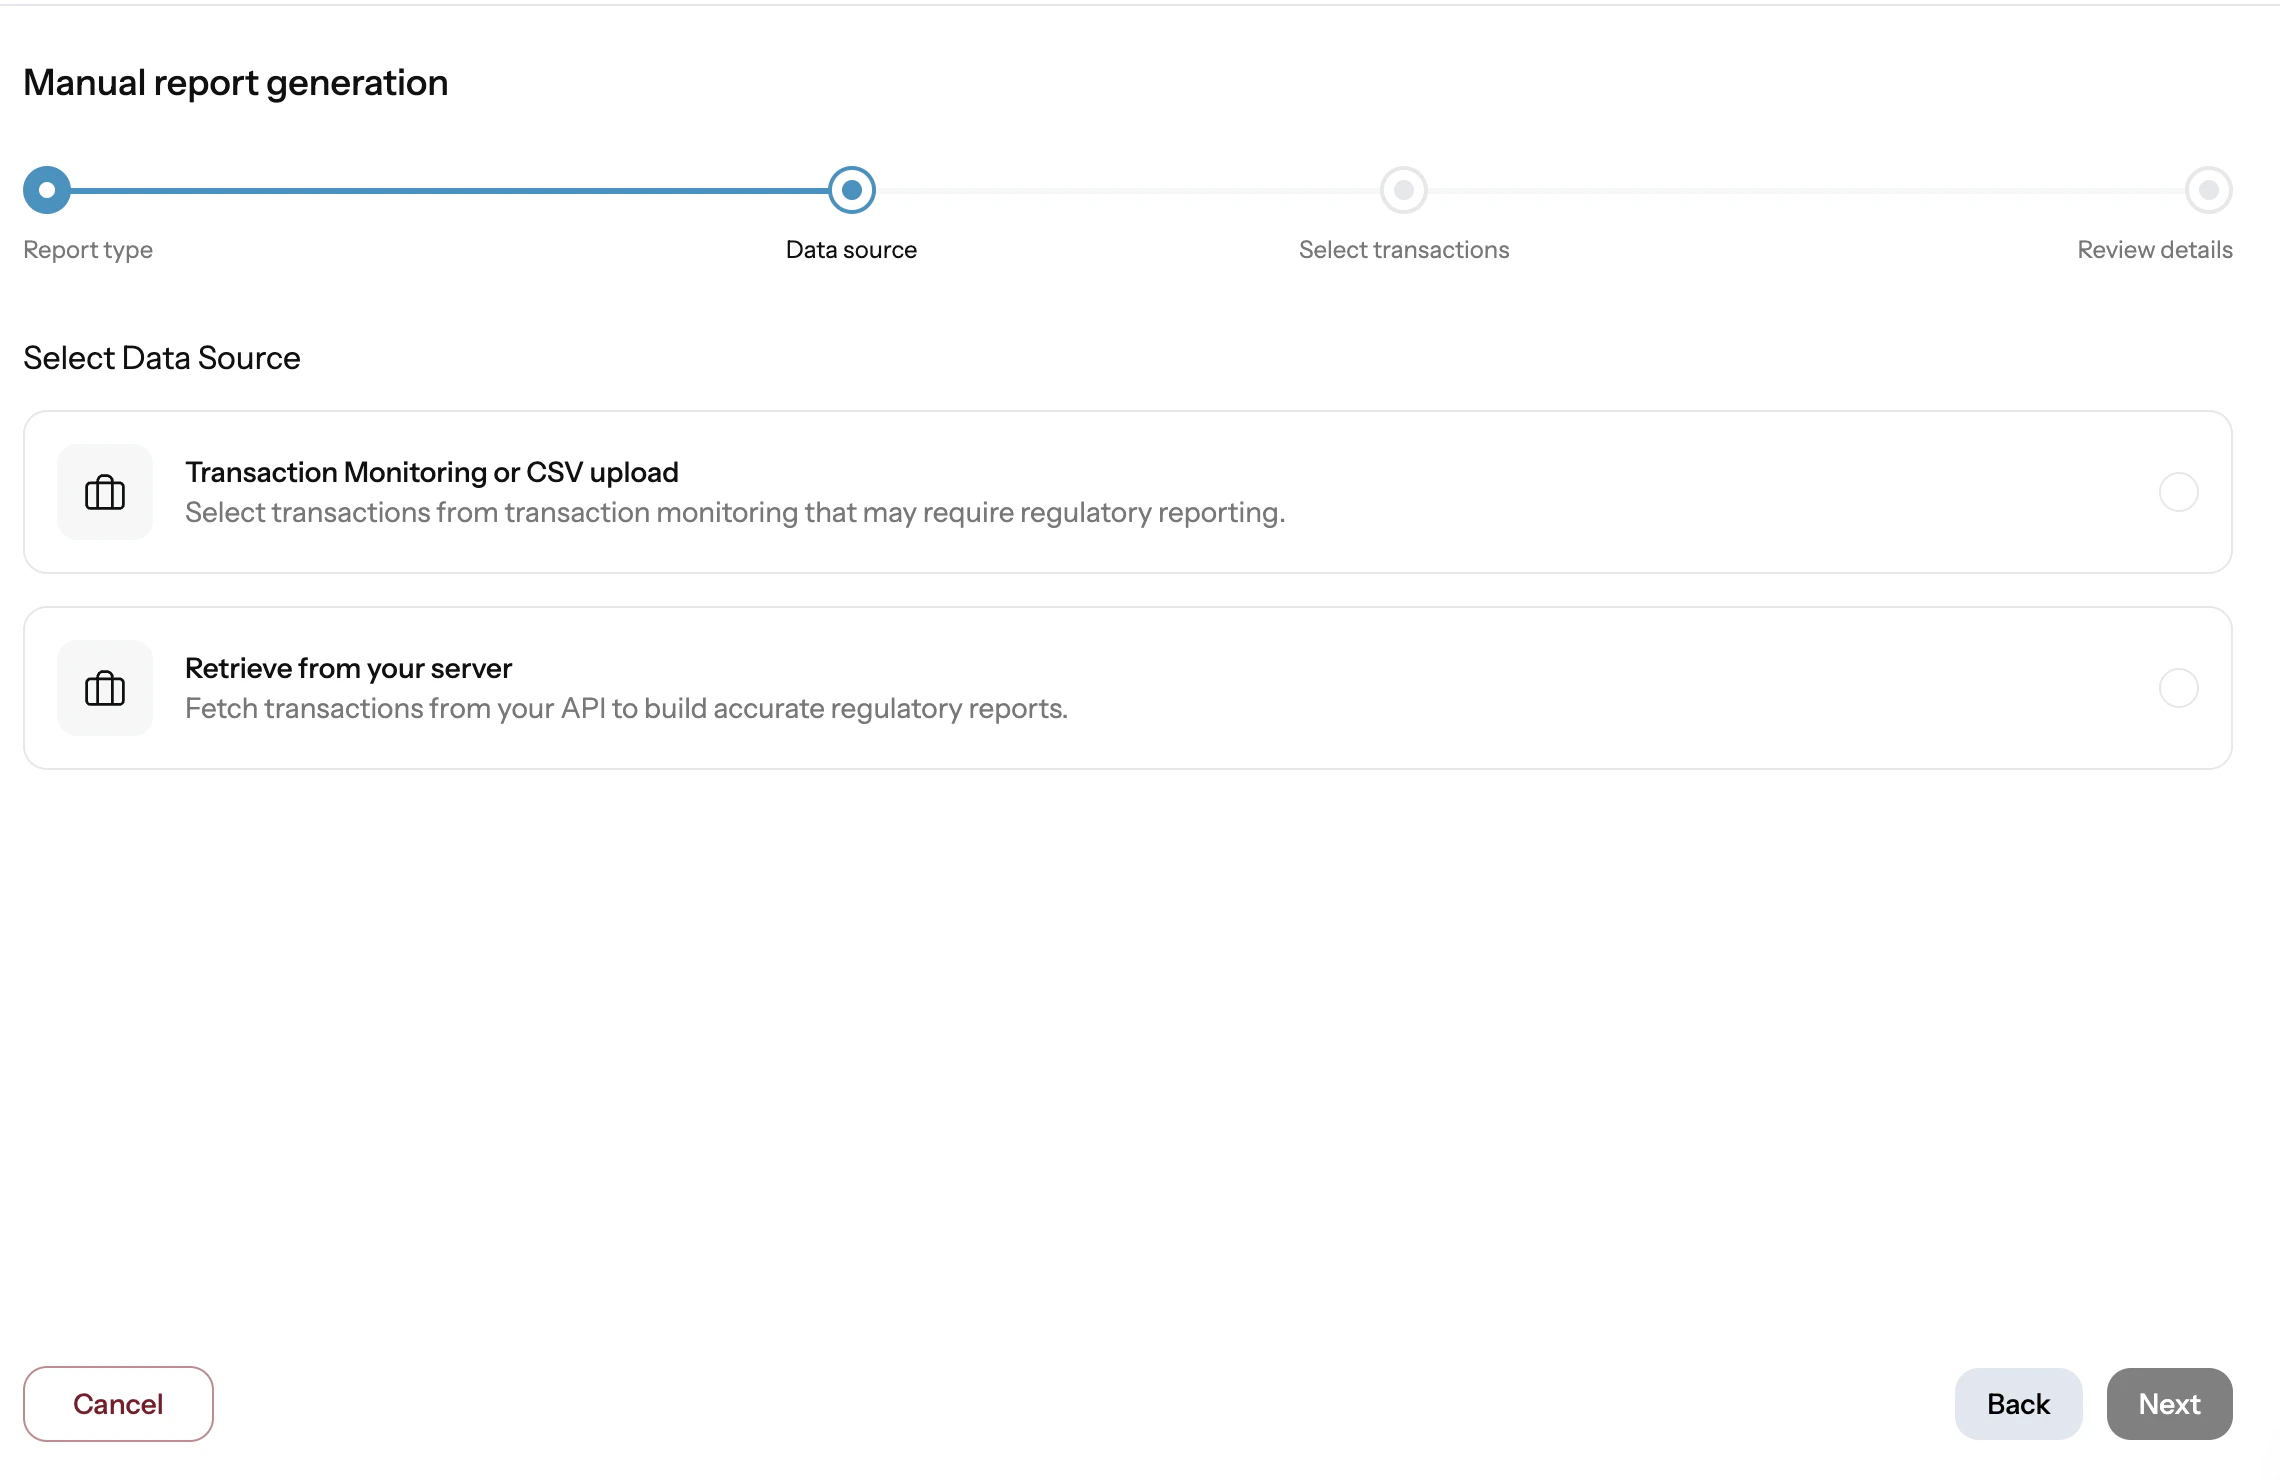
If you select SAR, Sigma still starts from the same manual reporting wizard, but the report page focuses on suspicious activity parties, investigation notes, indicators, and report-level attachments instead of a transaction-only layoutData source options
You will see two source options:- Transaction Monitoring or CSV upload
- Retrieve from your server
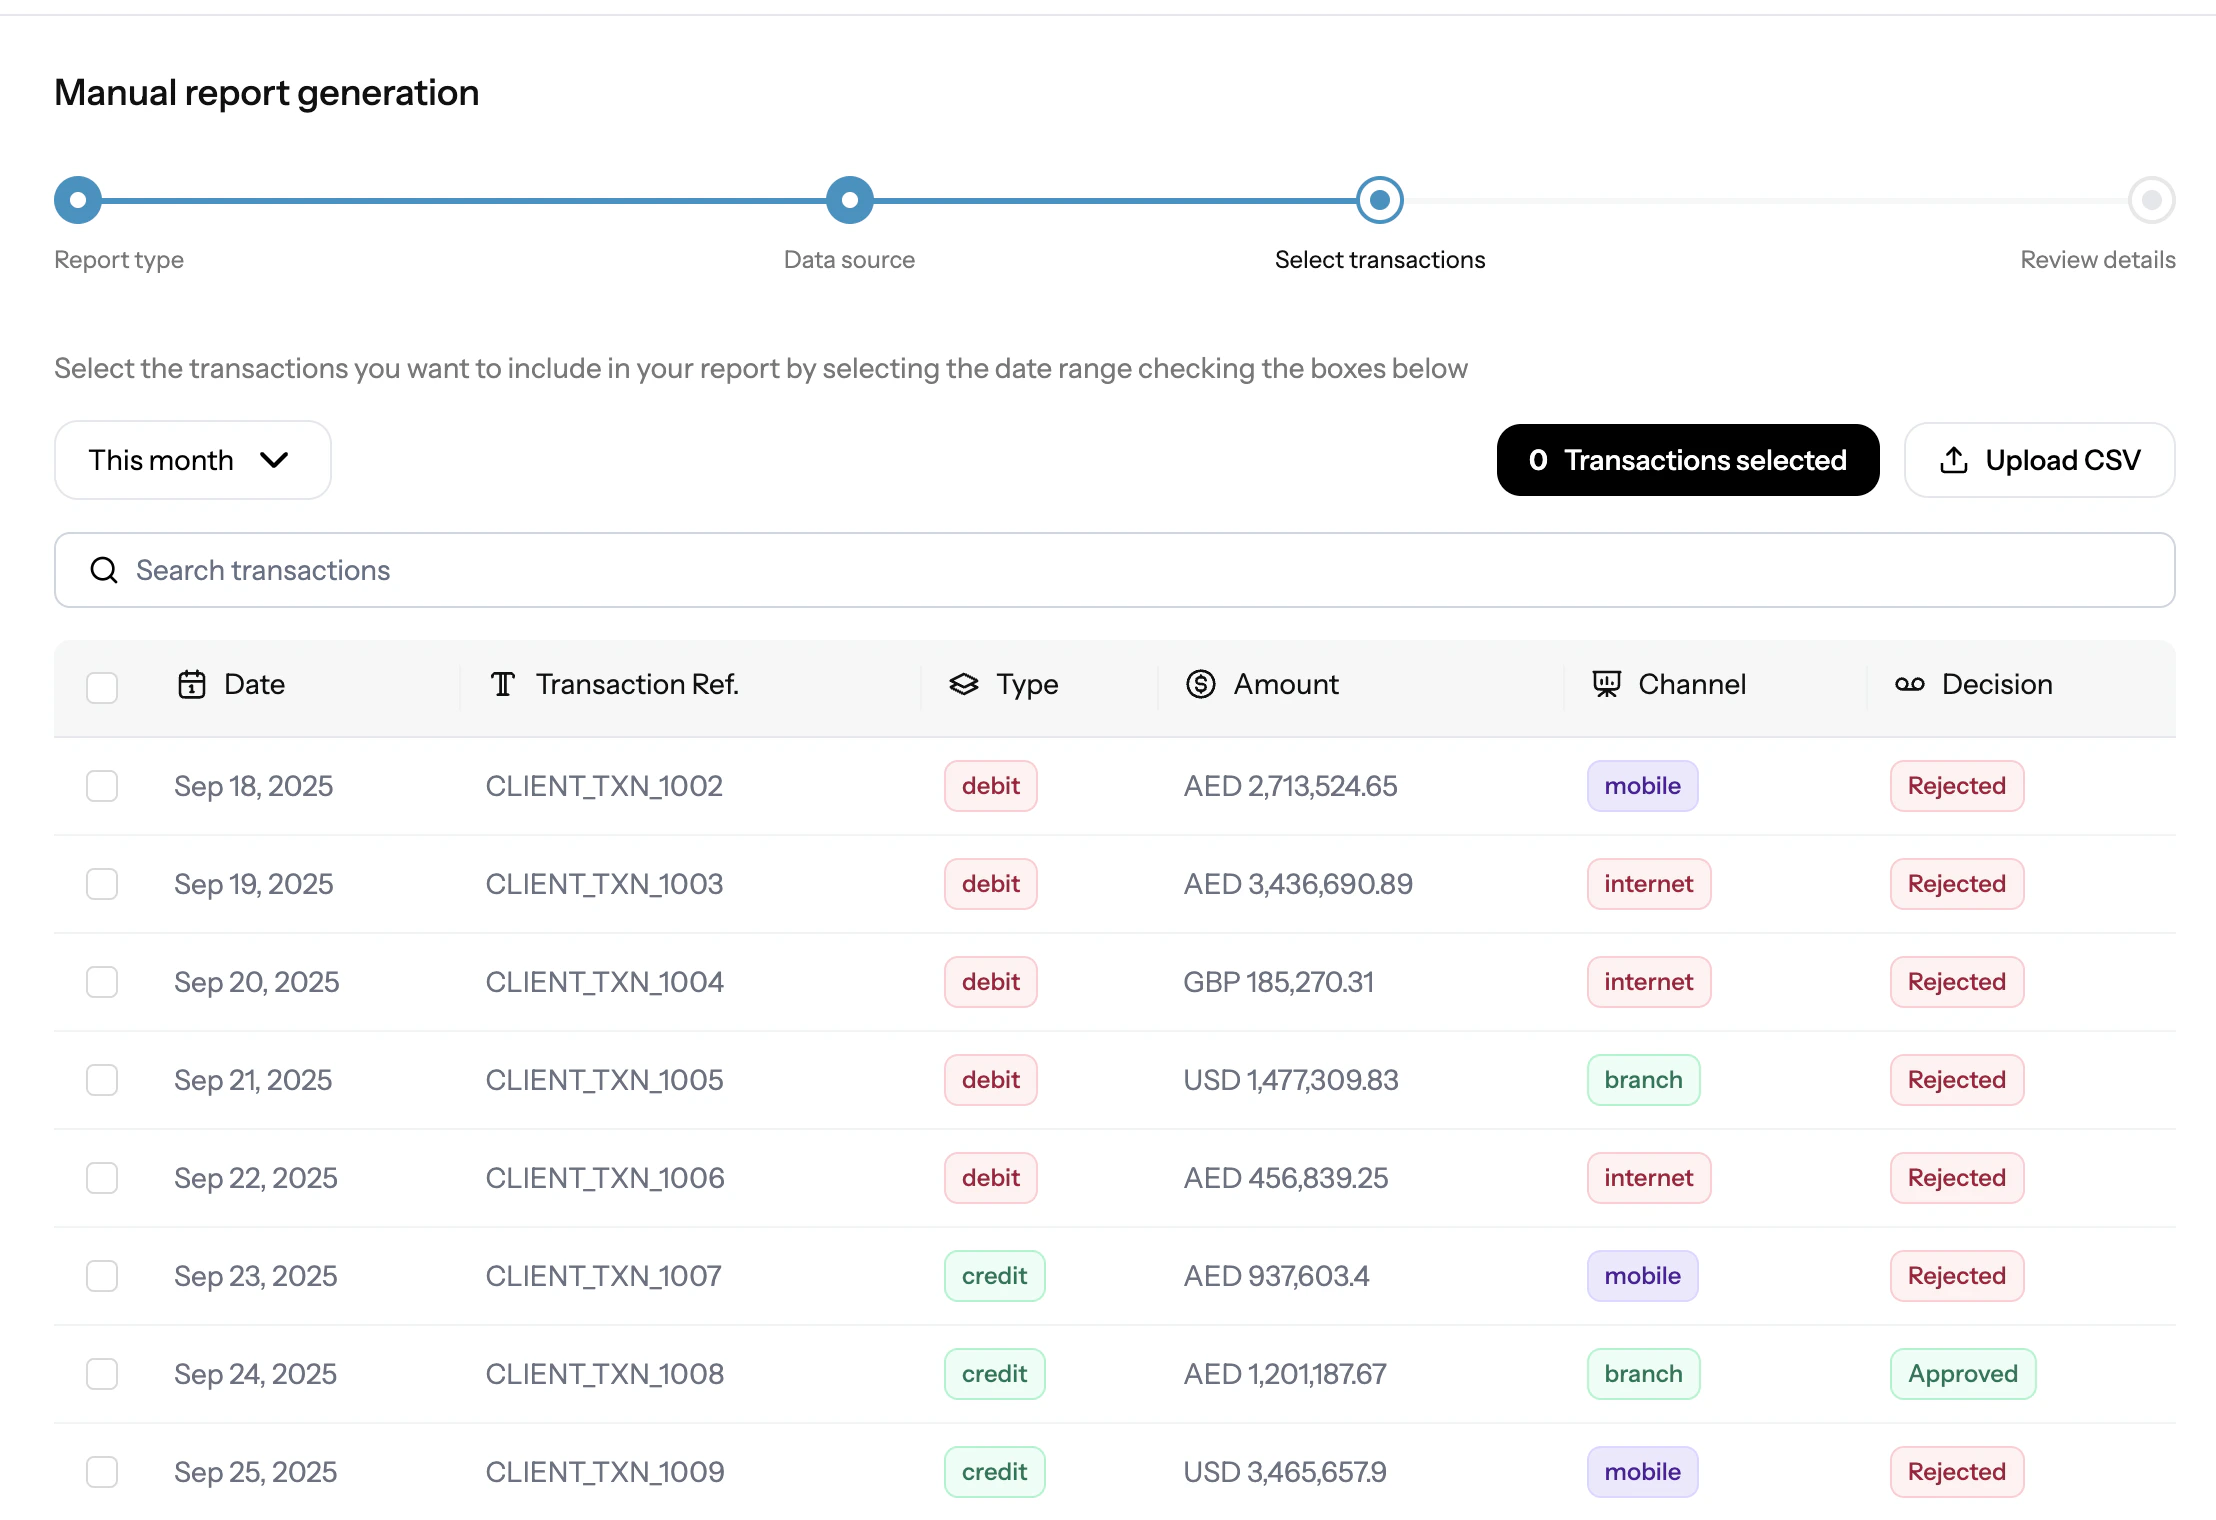
Transaction Monitoring or CSV upload
Use this option when the report should be built from transactions already visible in Sigma, or when you want to combine those records with CSV uploads.- Filter transactions by date range
- Search and select the transactions you want
- Use Upload CSV to add more rows from a template file
- Review the combined selection before creating the report
Retrieve from your server
Use this option when you want Sigma to fetch transaction details from your own API.- Upload a CSV containing transaction IDs only
- Sigma uses your saved Manual API Connection in Reporting → Preferences → General
- Review the returned rows before creating the report
Review and create
Before Sigma creates the report, the wizard shows a review step where you can confirm the records that will be included. Use this step to confirm:- The selected report type
- The selected transactions or uploaded rows
- Any fetched transaction details returned from your server
- That the data source matches the filing you want to prepare
Manual reporting flow:
Select transactions for reporting
CSV Upload Format
Full Transaction Data CSV
For direct CSV upload, Sigma validates against the exact template header order below. The safest approach is to download the template from the upload screen and fill it in without changing the column names or order.- Use a valid transaction reference in
transactionnumber - Use a valid date-time string in
date_transaction - Enter a numeric amount in
amount_local - Use the appropriate code values for fields such as
transmode_code,type, and funds-code columns - Keep both
from_*andto_*sections populated according to your transaction data - Keep all template columns present even if some values are blank in your workflow
Transaction ID Only CSV
For retrieve-from-server flow, upload a single-column CSV of transaction IDs:After you create the report
After you click Create Report, Sigma opens the report management page so you can complete:- General Information
- Transactions or Activity
- Investigations
- Indicators
- Attachments
Best practices
- Validate transaction data before creating the report
- Keep supporting evidence ready for review before you submit the report
- Reuse your saved entity and agent defaults where possible to reduce setup time
- Review fetched transactions carefully if you are using the server-retrieval flow
- Save frequently once you begin editing the report page
Tips
- Review selected rows before creating the report
- Keep your API connection saved if you use the retrieve-from-server option
- Reuse your default agent and entity to speed up report setup
- Fix CSV validation issues and re-upload if Sigma reports header or row errors
- Save after uploading attachments so view/download links can resolve properly